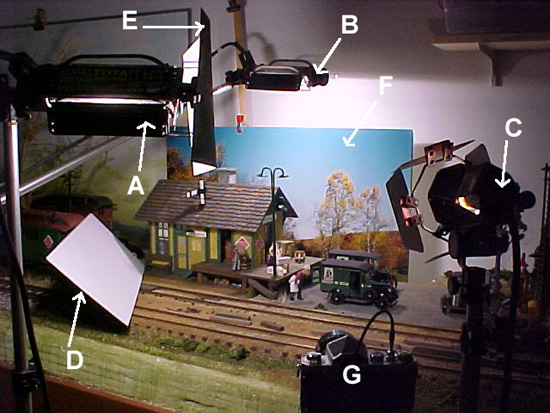
 The photo at right shows a more complex lighting set-up.
 The diagram at right shows a basic setup for lighting a model railroad scene. I use Lowel Tota lights with 500w halogen bulbs. However, inexpensive photofloods with reflectors will work well.
Much of the work in getting a good shot is in setting up the scene so that you have a well-composed, exciting picture that tells a story. Once you have the set constructed, you can set up your lighting.
Avoid the temptation to use your on-camera flash. The results will be awful, unless you have a macro-flash set-up. You don't have to spend a lot of money for lights. You can buy work lights with large silver reflectors at Wal-Mart, Lowes, or Home Depot for just a few dollars. These lights come with a clamps. You can use step ladders, furnitures, shelving, etc., to attach your lamps as needed. You will need at least two. You can buy photoflood bulbs at a camera store to fit these lamps. These lamps come in several wattages, usually 250 or 500. Be extremely careful as these lamps get very hot. They could start a fire at worst, cause a severe burn, or melt your models! Don't leave these lights on for very long. Turn them off while setting up your shots and keep a close eye on them.
The photo at right shows a more complex lighting set-up.
Fill light can come from a number of sources. Reflectors work will if you only have one light. Position reflectors (white cardboard, plastic, or photographic reflector material) to bounce light under the carriages of rolling stock and lighten shadows under structures. You can also use another light, either bounced from the ceiling, a reflector, or set back further to reduce the power. You can also substitute a smaller bulb for less power. The fill should be a stop or two less than the main light, depending on the effect you want. If you have an incident light meter, you can set precise lighting ratios. Set the fill light to the right or left of the camera, depending on how you want the light to fall. I generally keep the fill light at about the same height as the camera. This ensures good fill on the trucks and wheels and under the eaves of structures.
To determine exposure, I set a gray card in front of the subject and take a reading with the camera's built-in meter. A center-weighted meter works fine; just keep the center spot on the gray card. Again, you can also use an incident meter to determine exposure. Just hold the meter in front of the subject and point the white sphere back towards the camera.
Before taking your picture, make sure you have everything set correctly on the camera. Check your focus. Study the image in the viewfinder to make sure the scene is exactly as you want it. It's easy to overlook a flaw that will ruin your picture. Be careful to frame the image so that the edges of the backdrop don't show. Bracket your pictures, even with print film.
Once you have the hang of this basic setup, creating special effects is easy. Add drama with back or side lighting by moving your main (key) light around. With back and side lighting, more care is needed to make sure you don't create flare in your lens. You may need to rig up some cardboard flags to block light from directly striking your lens. You can add colored filters to create sunsets, dawns, and night scenes.
[Menu]