I didn't have the right electrolytic caps on hand during his visit, so I replaced those after he returned home. I placed two of the larger electrolytic caps in the original multi-can, and the small cap under the chassis. And I repainted the cabinet.
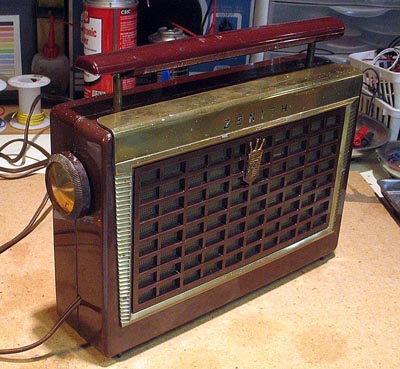
I picked up this Zenith portable tube radio at a consignment store as a project to work on with my grandson when he came to visit for a couple days. After showing him how to remove a wax/paper cap and relace it with a new one, I let him replace the remaining caps. The radio was dead after the recap, so we pulled the tubes and found two bad ones. After replacing the tubes, the radio played well.
I didn't have the right electrolytic caps on hand during his visit, so I replaced those after he returned home. I placed two of the larger electrolytic caps in the original multi-can, and the small cap under the chassis. And I repainted the cabinet.
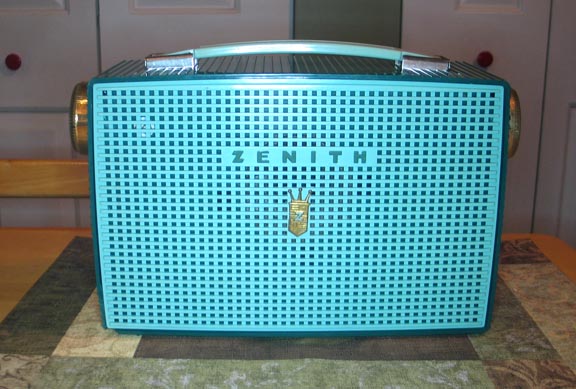
Even though Zenith by now was producing the very popular transistorized Zenith Royal 500 coat pocket radios, and the larger 800, they continued to produce tube portables, including the tube Trans-Oceanics until 1963. The Trans-Oceanic B600 was the last tube portable radio made in the United States. There are several different styles of these late tube portables, this nice green one was found in an antique store in South Carolina. Some of radios in this style are badged "Santa Monica."
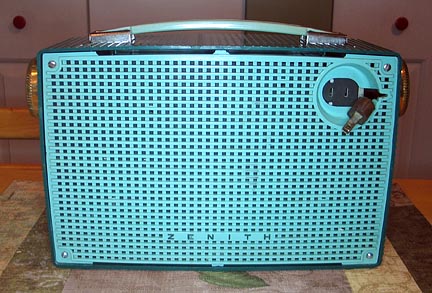 One of the features of this upscale model is a retractable power cord. The mechanism looks almost the same as that featured in the top of the line Zenith 600 series Trans-Oceanics which debuted in 1954. The female outlet next to the plug is the battery change-over switch. When using battery power, the AC plug is inserted in the female plug.
To disassemble the radio, the platic handle must be removed from the metal bosses by squeezing retaining pins inside each loop, then twisting slightly to free the handle. The chassis mounting screws can then be removed from the top of the radio (the chassis is mounted upside down in the radio, a common feature in most of these late tube portables made by Zenith and others. The volume knob pulls off, but the tuning knob has a toothed lock washer on the inside which must be loosened from the shaft before you can pull off the tuning knob. I nearly destroyed the tuning knob before I discovered this little example of over-engineering.
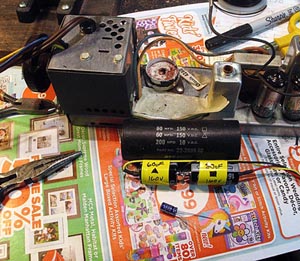
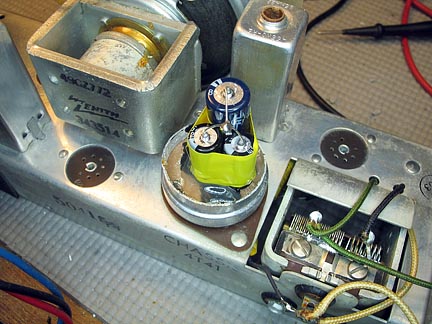
The radio played very well as found, but I replaced all the capacitors anyway, including re-stuffing new electrolytic capacitors in the original can (photo above, left).
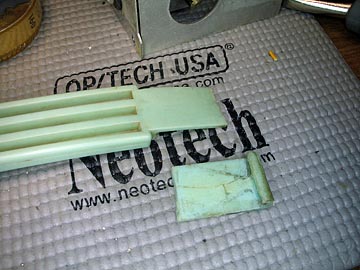
Apart from a small chip at the lower left front of the case, the only other cosmetic flaw was a broken carrying handle. I made a repair that looks OK, but the handle isn't really usable. The pliable delrin type plastic used in the handle isn't rigid enough to make a permanent bond with any glue. I used superglue, and reinforced the handle loop with tape on the inside, but it would easily break again if used.
This is a four tube radio, using the typical 1R5 converter, 1U4 detector, 1U5 amp, and 3V4 output tube. AC is rectified with a selenium rectifier. The radio uses 120 VAC or a 7.5 volt/75 volt AB battery, but I have not made one to try it out on battery power.

I found this 7 tube am/fm Zenith Long Distance radio in an antique shop in western Illinois while on a camping trip. The tag on the radio said it "worked," and when I got it home and brought it up on a Variac, it did play with decent sound, but virtually no volume. I replaced one weak tube, and then I replaced the electrolytic capacitors and tried it again, but still low volume, and a voltage check indicated the selenium rectifier was not putting out sufficient voltage. I replaced it with a silicon diode and dropping resistor, and the radio played fine after that. I then replaced the remaining paper capacitors and a couple resistors.
I disassembled the cabinet and washed it in Dawn dish detergent and then cleaned it with rubbing compound several times, then buffed and polished it with Novus #2 and #1. The dial pointer was pitted and missing some paint, so I sanded it smooth and repainted it.
Finally, I added a 3.5mm auxiliary audio input on the back for an iPod, MP3 player, or CD player. The radio is quite sensitive and picks up all the local AM and FM stations quite well, and the audio quality is excellent for a table radio. It is my new bedside radio.
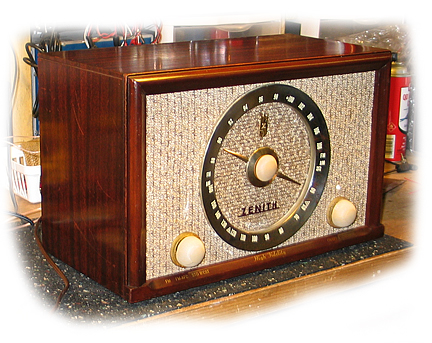
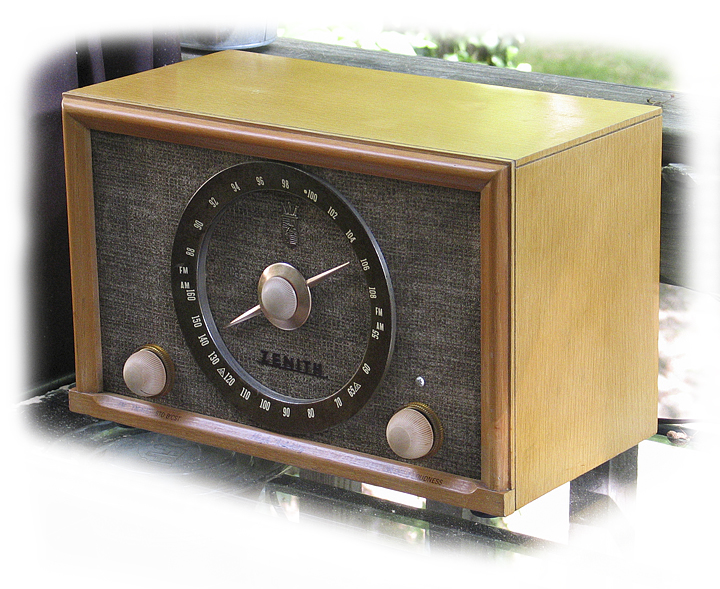
These radios are considered by some to be among the best sounding American made radios of mid-20th century. A 7 tube AM/FM high fidelity radio with phono input, the 835 series radios have a large center speaker behind the tuning dial and two electrostatic tweeters. The bass response is very good, and with the phono input, it's a great iPod player. There are quite a few models in the 835 series, and there are similar 725 and 845 series models as well. Both of these radios are B835's. The letter after the 835 denotes the cabinet color, E for blond and R for mahogany.
These are not difficult radios to restore. I restuffed the filter cans on both radios and replaced all the wax/paper caps. The dial cords to the tuning knobs were broken on both radios, so I had to restring those, and I replaced the selenium rectifiers in each radio with 1N4007 diodes and 100 ohm, 2 watt dropping resistors.
The cabinets of both radios were in fairly good condition, so I decided not to strip and refinish them. Both got a good cleaning of the cabinet and knobs, which is all the blond cabinet needed. The mahogany cabinet had quite a few scratches, so I used Howard's Restor-A-Finish on it. I cleaned the dial pointers and dial rings and lightly sprayed them with lacquer to prevent further corrosion. I did have to replace the cloth front on the blond cabinet as it was beyond help. I found a nice green, subdued pattern at Jo-Ann fabrics in the remnants bin for a couple dollars that looks very nice in the blond cabinet and the pattern, while very different from the original, is appropriate for the style and era. The mahogany radio retains its orginial front covering.
Operation of these radios is not intuitive. The knob in the center of the dial pointer is actually the tone control, and it turns independently of the dial pointer, of course. Tuning is accomplished by rotating the inner, amber ring on the left bottom of the radio. The almond outer knob is the band selector for AM, FM-AFC, and FM. The right hand knob is the on/off/volume knob. The inner and outer knobs are locked together. There is a phono input on the rear, and a slide switch on the rear is used to select radio or phono operation, which is rather awkward. Not including a Phono position on the band selector knob so phono operation could be selected without reaching behind the radio is a serious design flaw in my opinion. Otherwise, these are very nice radios with much better sound than most tables radios, surpassed perhaps only by the European radios of the era.
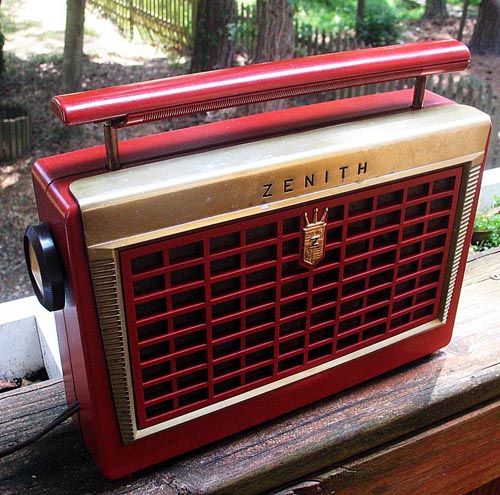
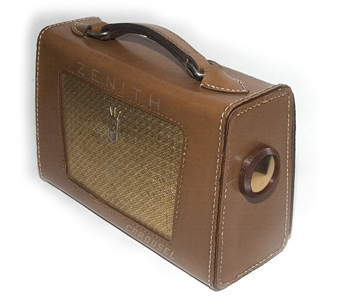 The radio at left is a very nice Zenith Z404L, leather cased portable from 1956. This is a four tube design, using the 1U4, 1U5, 1R5, and 3V4 power tube. This radio picks up a lot of stations, although the small tuning capacitor requires some toggling to get a weak station in just right. Sound quality is nice, and it has a very stylish look. I first brought the radio up on a Variac and got only a weak hum. I tested the tubes and found that the 3V4 was bad. I replaced it and the radio came to life, no hum or static. I took a peek inside the chassis, but decided not to recap it since it was playing well. The chassis is quite small and recapping will be a challenge when the time comes. I cleaned the leather with a moisturing body wash bath soap and a lightly dampened towel. One handle gusset was detached when I got the radio, and during the cleaning process, many of the dry-rotted stitches holding the end panels in place broke. Although the leather looks good, it is quite brittle and cracks and flakes easily. I removed both handle gussets, installed new reinforcing and re-riveted them to the case. I then re-sewed the gussets and replaced the lacing in both end panels. I cleaned the knobs in a ultrasonic cleaner and polished the brass with Brasso. I used gold paint to touch up the frequency numbers on the tuning dial (not visible in the photos). I then gave the leather case a good coat of saddle soap.


