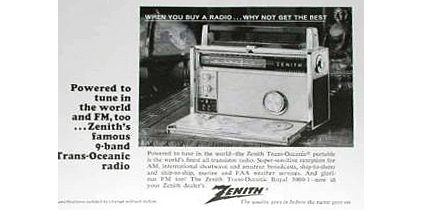
Zenith Trans-Oceanic
Royal 3000 Series Solid State Trans-Oceanics
1962-1971
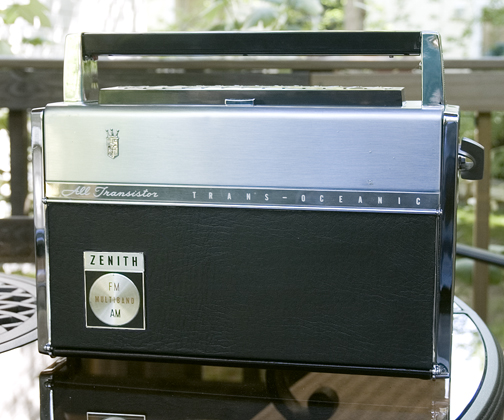
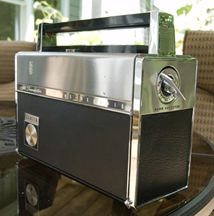
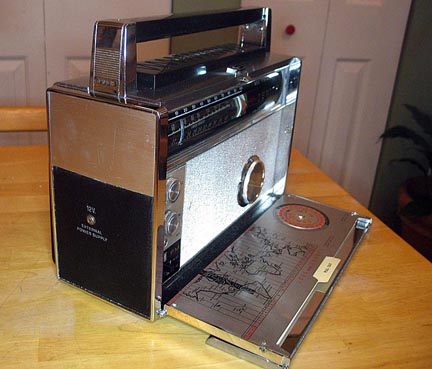
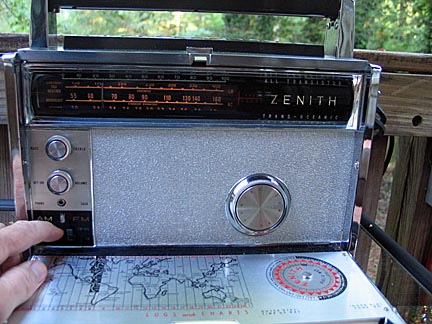
1963 Zenith Trans-Oceanic Royal 3000
Click here for Audio and Video
 Although I thoroughly enjoy the tube Trans-Oceanics, and the large components and hard-wired chassis are much easier for old eyes and clumsy fingers to deal with, they are large and heavy to lug about. I had been tempted to try one of the transistorized Trans-Oceanics for a deck radio, and finally bid on and won a very nice model Royal 3000. I found out quickly that the transistorized Trans-Oceanics are just as heavy, if not heavier, than the tube TO's.
 The 3000 series Trans-Oceanic was introduced in late 1962, and was primarily a revised model 1000 with an FM tuner. In 1964, Zenith added provisions for an ac adapter and redesignated the 3000 as the 3000-1. The 3000 series and 1000 series have many parts in common. Based on part numbers, it appears my radio was manufactured in late 1963. 1968 was the last year of production for the 3000 series as the 7000 series, a completely new radio with an updated cabinet and electronics, was introducted in 1969.
Repair and Restoration of the Zenith Trans-Oceanic Royal 3000
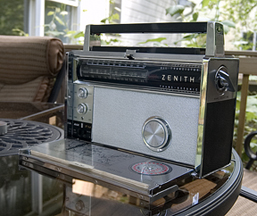
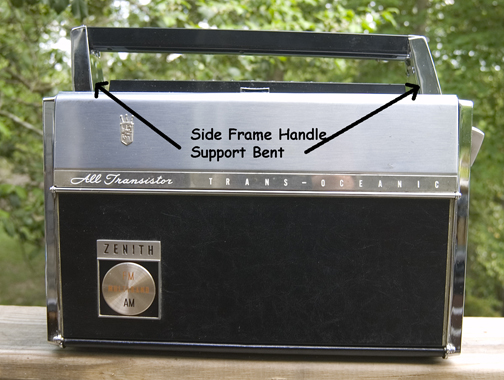
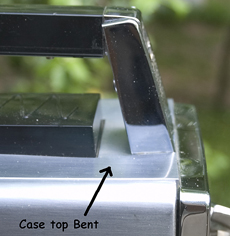
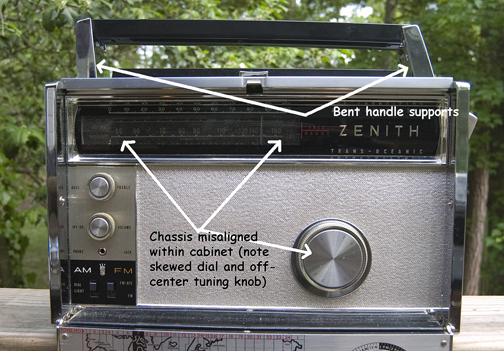
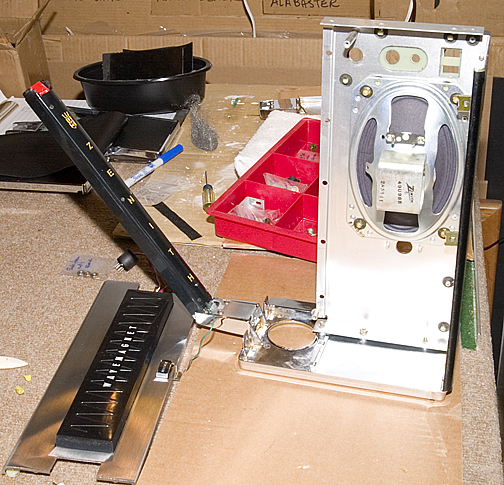
Unfortunately, the seller did not pack the radio well, and it suffered extensive damage in shipping. Fortunately, the radio was insured and I recovered the costs of replacement parts to restore the radio. The two photos above show the restored radio. In addition to the visible damage in the photos below, the knobs and dial were misaligned, and the top of the case was bent, the tip of the antenna (concealed in the carry handle) broken, and a door stop broken. The dial bezel was also broken loose from its mounting studs
In spite of the damage, the radio played very well, with excellent audio quality. I used WWV to check dial alignment at various frequencies, and the stations were dead on except for one band, which was slightly off. I left the alignment alone.
Disassembly of the Radio
Meanwhile, I disassembled the radio completely and serviced the chassis as recommended by Bryant and Cones in their excellent book, "The Zenith Trans-Oceanic, the Royalty of Radios." One of the recommendations in this book is to strengthen the handle, which also contains the whip antenna, by packing it with epoxy putty, which I did.
Servicing the Chassis
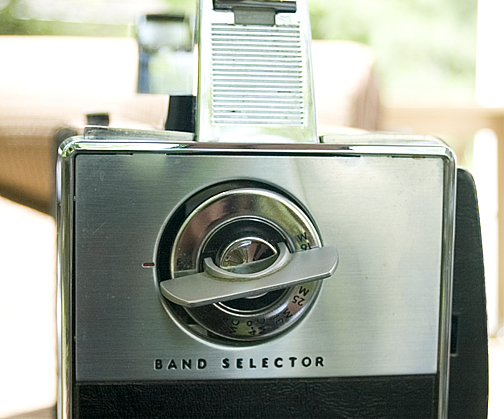
Service consisted of cleaning all the contacts with contact cleaner (volume, tone control, and band selector), lubricating friction points in the dial tuning mechanism, and installing fresh bulbs in the dial light circuit.
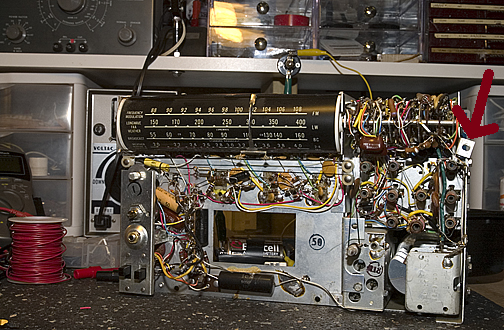
Note the bent chassis lug (red arrow) in the photo above. Straightening out this lug eliminated the misaligned knobs and dial.
Repairing the Case Framework
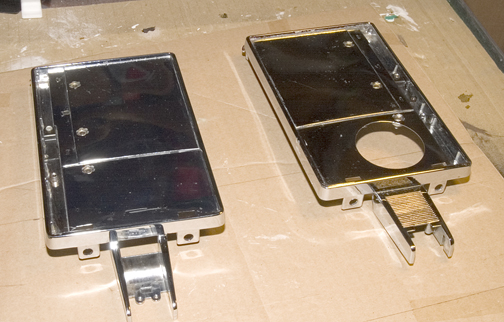
As I assessed the damage, I doubted I could repair the top and side frames as they appeared to be die-cast metal, and I was sure the metal would break if I tried to straighten the parts. I found a used top, and right and left side frames, at John Kendall's Vintage Electronics.
When the parts arrived, I found the top was excellent, but the left and right side frames were not quite as nice as my damaged originals, as they showed some pitting and heavy scratching. I decided to try and repair the damaged side frames, and only use the replacement parts if I was unsuccessful. I experimented with wood blocks and screw clamps, and eventually succeeded in restoring the bent side frames to their original shapes (below, left).
Recovering the Front and Side Pieces
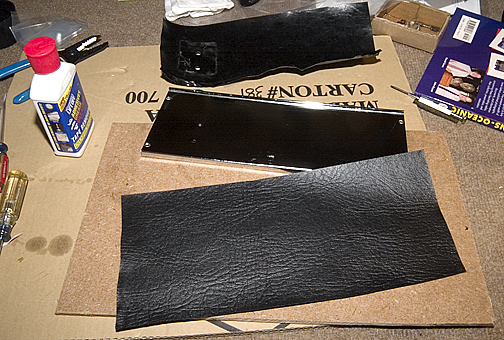
 Although the black vinyl covering was in good condition, it had shrunk over the years, especially on the front cover, so much so that the edges of the side trim screws were showing, which seems to be a very common condition seen in these radios. So I ordered some Black Buffalo Mojotone Tolex from Mojo, a vintage guitar parts seller. I removed the original vinyl covering, cleaned the metal, and glued on the Tolex using Weldwood water-based contact cement (photo at left, and above, right). I had tried using the solvent contact cement, but it bled through, causing dimpling of the material.

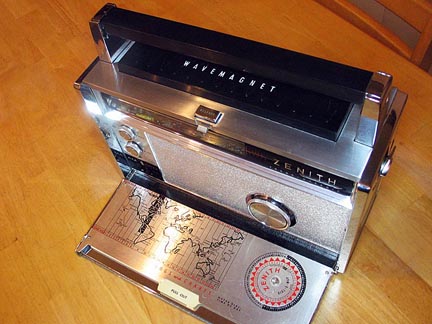
Restoring the Wavemagnet Antenna and Top Piece
I removed the Wavemagnet antenna from the damaged top (photos, above and right)and re-installed it in the new top piece. I also restored the lettering and logo on the bottom of the handle/whip antenna assembly using a water-based acrylic paint (photo, right).
As I disassembled and reassembled this radio, I was very impressed with the quality of the materials. It's been a long time since I've seen any product as well engineered and constructed as this radio. Everything went together very nicely, and the intelligent design made tear-down and rebuild quite simple. I'm especially impressed with the audio quality of this radio. Zenith gets a lot of quality out of a small speaker, and while I'm not a radio techie, apparently the use of matching transistors and a push-pull amplifier section have a lot to do with the great sound.
Although the Royal 3000 lacks the phono input of the 1000 or 1000-D, it's still possible to play a CD or MP3 player through the radio. Here's a tip on how to do it from Dave Doughty, moderator of the Transistor Radio forum on the Antique Radio Forum: The RCA jack on the back panel of the 3000 is for an FM tuner audio output, but can be used as an input jack if the device used has a high level, low impedance output such as is available at the headphone jack of many CD or MP3 players. Turn the bandswitch selector knob of the radio to a position between bands to kill radio reception. Connect your device and you should hear the audio from the radio. Refer to the Zenith Trans-Oceanic Royal 1000-D page for suggestions on the connectors and cables needed to convert the 1/8" stereo headphone output of the device to the RCA mono input of the radio.
1964 Zenith Trans-Oceanic Royal 3000-1
 In 1964 Zenith added a 12vdc AC adapter to the Zenith Royal 1000 and Royal 3000. These models are identified by the suffix "-1" after the model number (1000-1, 3000-1). Since the solid state Trans-Oceanics have a positive ground, the tip of the AC adapter is negative, and care must be taken to use an original Zenith AC adapter, P/N S-64352. The solid state Trans-Oceanics draw only 20mA, and a modern 12v AC adapter may damage the transistors. A 9v AC adapter with the proper size (3/32") tip and polarity may be more suitable.
I picked up my 3000-1 for $5.00 at a hamfest. The seller guaranteed it "not to work." Additionally it was missing the dial cover, the battery box, and the vinyl covering on the end panel where the AC adapter plugs in.
However, the cabinet was otherwise in very good condition. Most of these radios, unfortunately, have some serious pitting and corrosion issues. This one was almost blemish-free and well worth restoring.
The radio did not work, as the seller had "guaranteed."
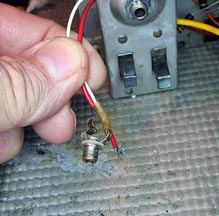
The first problem was no power due to a broken switch on the AC adapter jack (see photo, below, left). I used a jumper to connect the red and white wires, which restored power.
Although the audio section was now working, there was no reception on AM, SW, or FM. The problem turned out to be a bad 3rd IF transistor. As soon as I replaced that, the radio received on all bands with excellent sensitivity. After a recap, it sounded just like new.
 I obtained a dial cover from a junker radio, which also provided the transistor I needed for the 3rd IF, as well as the missing vinyl for the end panel (photo, above left). I also salvaged the AC adapter jack from the junker and installed it in my radio. The jack is switched so that when the adapter plug is inserted, the battery pack is disconnected. If the jack is broken, the radio may not play on battery power, which was one of the initial problems with my radio--it wasn't getting any power due to the broken jack.
This radio is a very nice looking radio, and an excellent performer.


